
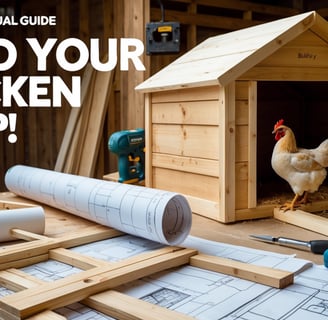
How to Build a Wooden Chicken Coop: A Step-by-Step Guide
Looking to build a sturdy and comfortable home for your chickens? This step-by-step guide walks you through the process of building a wooden chicken coop, from planning and choosing materials to assembly and predator-proofing. Learn how to create a safe, well-ventilated, and easy-to-clean coop that will keep your flock happy and secure. Whether you're a beginner or an experienced DIYer, this blog has all the tips and tricks you need to build the perfect chicken coop. Start your DIY project today! 🛠️🐔
3/12/20254 min read

How to Build a Wooden Chicken Coop: A Step-by-Step Guide
Create a Safe and Cozy Home for Your Chickens!
Raising chickens is a rewarding experience, but they need a safe, sturdy, and well-designed coop to thrive. A well-built wooden chicken coop protects your flock from harsh weather and predators while giving them a comfortable space to roost and lay eggs.
If you’re ready to build your own DIY wooden chicken coop, this guide will walk you through the essential steps, from choosing materials to final assembly. Whether you’re a beginner or an experienced DIYer, you’ll find tips and tricks to make your coop functional, durable, and easy to maintain.
Let’s get started! 🛠️🐔
1. Planning Your Chicken Coop 📝
Before you start building, take time to plan the size, design, and location of your chicken coop.
Key Considerations:
✔️ Size – Chickens need at least 2-4 square feet per bird inside the coop and 8-10 square feet in the run.
✔️ Ventilation – Proper airflow prevents moisture buildup and keeps your flock healthy.
✔️ Protection – Use predator-proof materials and secure latches to keep raccoons, foxes, and other animals out.
✔️ Easy Cleaning – Design your coop with removable roosting bars, large doors, and a sloped floor for hassle-free maintenance.
💡 Pro Tip: Sketch out your design or find a free coop plan online to ensure all elements are well thought out before you begin cutting wood.
2. Choosing the Right Materials 🪵
A solid chicken coop starts with quality materials that can withstand the elements.
Best Wood for a Chicken Coop:
✅ Pressure-Treated Lumber – Ideal for the base and frame (but keep it away from where chickens roost).
✅ Plywood or Cedar – Great for walls, doors, and nesting boxes.
✅ Hardware Cloth – Stronger than chicken wire, it prevents predators from breaking in.
✅ Metal Roofing or Shingles – Provides long-lasting protection against rain and sun.
💡 Pro Tip: Avoid using toxic wood treatments inside the coop—stick to natural, bird-safe finishes.
3. Building the Frame and Base 🔨
Step 1: Construct the Base
The base is one of the most important parts of the coop. It should be sturdy and raised off the ground to prevent moisture buildup and keep predators from digging under.
✔️ Use 4x4 treated lumber for the foundation.
✔️ Elevate the coop at least 12 inches off the ground.
✔️ Cover the floor with plywood or solid wood for a secure base.
Step 2: Build the Frame
Now, assemble the frame using 2x4 lumber for strength. Secure the corners with screws and make sure everything is square and level before attaching walls.
💡 Pro Tip: If you live in a cold climate, consider adding insulation between the walls for extra warmth.
4. Adding Walls, Doors, and a Roof 🏠
Once your frame is in place, it’s time to enclose the coop.
Step 3: Attach Walls and Nesting Boxes
✔️ Use exterior-grade plywood to enclose the walls.
✔️ Cut openings for ventilation and windows.
✔️ Install nesting boxes (one for every 3-4 chickens), about 12 inches off the ground.
Step 4: Secure the Roof
✔️ Choose a sloped roof to allow water runoff.
✔️ Use metal roofing or shingles for durability.
✔️ Install roof overhangs to keep rain out of the coop.
💡 Pro Tip: Add hinged doors on the nesting boxes for easy egg collection!
5. Building the Chicken Run 🏃♂️🐔
Chickens need outdoor space to scratch, peck, and roam. A secure chicken run keeps them safe while giving them fresh air and exercise.
How to Build the Run:
✔️ Use sturdy wooden posts for framing.
✔️ Cover the run with hardware cloth (not chicken wire) to keep predators out.
✔️ Add a top cover (wire mesh or a solid roof) for extra protection.
✔️ Provide shade and perches inside the run.
💡 Pro Tip: Bury the fencing at least 12 inches underground to stop animals from digging under the run.
6. Ventilation, Perches, and Final Touches 🌿
Step 5: Add Ventilation
Good airflow is crucial for preventing moisture and ammonia buildup inside the coop.
✔️ Install vents near the roof for proper airflow.
✔️ Use hardware cloth over openings to keep pests out.
✔️ Adjust vents for seasonal airflow—more in summer, less in winter.
Step 6: Install Roosting Bars and Ladders
✔️ Chickens prefer to sleep on perches rather than the floor.
✔️ Use 1.5-inch-wide wooden bars placed about 2 feet off the ground.
✔️ Provide a ramp or ladder if needed for easy access.
💡 Pro Tip: Don’t place roosts above nesting boxes—this prevents dirty eggs!
7. Painting, Sealing, and Predator-Proofing 🎨
Step 7: Protect Your Coop
✔️ Use exterior paint or sealant to protect the wood from weather damage.
✔️ Apply non-toxic finishes inside to keep your chickens safe.
✔️ Install secure latches on doors to prevent raccoons from opening them.
💡 Pro Tip: If you live in a cold climate, consider adding a heated waterer and extra insulation for winter months.
Final Thoughts: Enjoy Your DIY Chicken Coop! 🐔
Building your own wooden chicken coop is a fun and rewarding project that will keep your flock safe, comfortable, and happy. By planning carefully, choosing the right materials, and following these steps, you’ll create a coop that lasts for years.
Recap of Key Steps:
✅ Plan the size, ventilation, and safety features.
✅ Choose durable, non-toxic materials.
✅ Build a sturdy base, frame, walls, and roof.
✅ Attach nesting boxes, perches, and ventilation.
✅ Construct a secure chicken run for outdoor space.
✅ Paint, seal, and predator-proof your coop.
Now it’s time to grab your tools and start building! Your chickens will love their new home, and you’ll enjoy the satisfaction of crafting it yourself. 🛠️🐓