Building Your First Birdhouse: Tips and Tricks
Want to build your first birdhouse? This beginner-friendly guide covers everything you need to know, from choosing the right wood to designing, assembling, and placing your birdhouse for success. Learn the best materials, ideal entry hole sizes for different birds, and pro tips on finishing touches. Whether you're a woodworking novice or a nature lover, this article will help you create a safe and cozy home for your feathered friends. Start building today! 🐦🏡✨
3/11/20252 min read

Building Your First Birdhouse: Tips and Tricks
Create a Cozy Home for Your Feathered Friends!
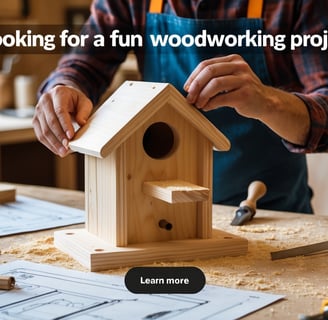
There’s something special about building your own birdhouse. It’s a fun, hands-on project that brings both creativity and a sense of accomplishment. Plus, nothing beats the joy of watching birds move into a home you built with your own two hands!
Whether you're a woodworking novice or just looking for a simple DIY project, this guide will walk you through essential tips and tricks to make sure your first birdhouse is a success.
1. Choosing the Right Wood 🏡
Why It Matters
The type of wood you use affects durability, insulation, and safety for the birds.
Best Wood Options:
Cedar & Pine – Popular choices due to their durability and availability.
Plywood (Exterior Grade) – Works well but should be untreated to avoid harmful chemicals.
Avoid Pressure-Treated Wood! – It contains chemicals that can be harmful to birds.
💡 Pro Tip: Use wood that is at least ¾-inch thick to provide proper insulation against extreme temperatures.
2. Designing the Perfect Birdhouse 📏
Size and Entry Hole
Different birds need different house sizes. Here are common dimensions:
Bird Species Entry Hole Size House Depth Chickadees 1 ⅛ inches 8 inches: Bluebirds 1 ½ inches 9 inches: Wrens 1 inch6 inches
Make sure the entrance hole is just big enough for your target bird—this helps keep out predators and unwanted guests!
💡 Pro Tip: No perches needed! Perches actually invite predators like squirrels and larger birds.
3. Assembly: The Right Way to Build 🔨
Cutting and Joining Pieces
Use wood screws or nails to assemble the house.
Avoid glue alone—it won’t hold up in harsh weather.
Drill small ventilation holes near the top for airflow.
Create drainage holes at the bottom so rainwater doesn’t collect inside.
💡 Pro Tip: Leave one side of the birdhouse hinged or removable for easy cleaning each season!
4. Picking the Best Location 🌳
Where to Place Your Birdhouse
Mount it 5-10 feet off the ground to keep birds safe from predators.
Face the entrance away from strong winds (usually towards the east).
Keep it out of direct sunlight—a shaded or semi-shaded spot is ideal.
💡 Pro Tip: Attach the birdhouse to a pole or tree, but avoid hanging it from a swinging chain—it needs to be stable for the birds!
5. Finishing Touches: To Paint or Not to Paint? 🎨
Natural vs. Painted Finishes
Leaving the wood natural is best—it blends with the environment.
If painting, use non-toxic, water-based paints in natural colors (brown, green, gray).
Avoid shiny, dark colors—they absorb heat and can make the birdhouse too hot.
💡 Pro Tip: Skip the varnish! Birds prefer a weathered look, and glossy finishes can be too slick for them to grip.
Final Thoughts: Enjoy Your DIY Birdhouse!
Building a birdhouse is more than just a woodworking project—it’s a way to connect with nature and give back to the environment. By choosing the right materials, following simple design principles, and placing the house in an ideal location, you’re creating a safe and welcoming home for birds in your area.
Now, grab your tools, build with care, and get ready to welcome some feathered tenants! 🐦✨
Have you built a birdhouse before?